Black Phosphate Etching and Passivation of Iron or Steel Parts or "Oil and Phosphate"
Introduction
Many bolts on the 1962 Thunderbird are incorrectly painted during restoration. When these bolts came from the factory, they were "dull S2" or "oil and phosphate" coated. The correct term is "phosphate conversion coating" and it can easily be replicated at home using common materials available at a home improvement store.
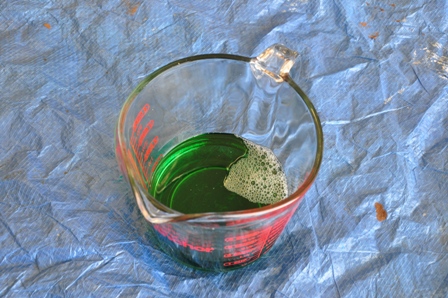
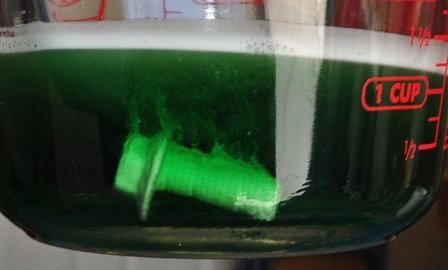
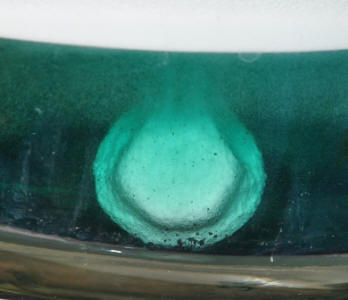
The Eastwood Company sells a product called a Metal Blackening Kit for $40 that includes a pint of solution that will blacken ferrous auto parts with a dull black finish that can be oiled or clear coated to appear like the original OEM parts coating. The refill bottle of their blackening solution is $17.99 plus shipping for a pint that will make two quarts or $36/gallon. A short Google search led me to an article in Wikipedia entitled Phosphate Conversion Coating. When phosphoric acid, or H3PO4, reacts with iron, the phosphate group precipitates onto the surface of the iron forming Fe3(PO4)2, or iron phosphate, and releases hydrogen gas. The iron phosphate is black in color but being only several microns thick, offers some corrosion resistance but is commonly oiled to provide additional corrosion resistance. Since the oil will eventually dry out, it can instead be clear coated with a flat or satin clear coat for longer protection. Phosphoric acid is sold as a consumer product to perform phosphatizing of rusted metal in preparation for painting. It is also the active ingredient in Naval Jelly.
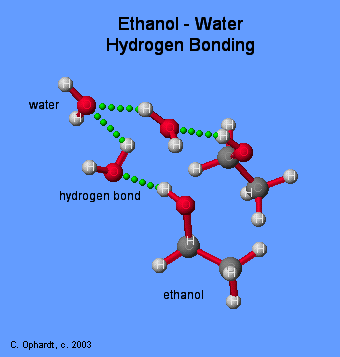
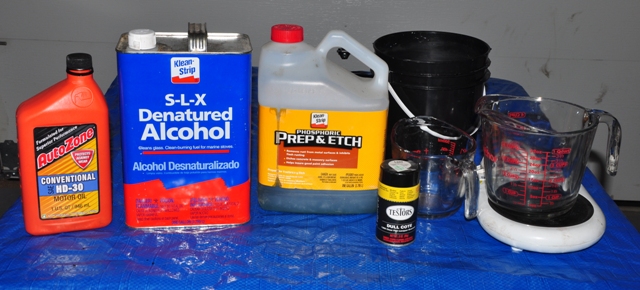
The chemicals to perform this process are readily available at Home Depot. Both items are in the paint department, Klean-Strip Phosphoric Prep and Etch and a quart or gallon of denatured alcohol (note: I could not find the Phosphoric Prep and Etch at Lowe's). I had originally used acetone; however, it is rather noxious and evaporates too quickly from the rinse cup. Remember the chemistry rule of thumb: like dissolves like. Water is a polar molecule, meaning is has a slight positive and negative charge and forms weak hydrogen bonds with other polar molecules (see the diagram below). Denatured alcohol is a mixture of ethanol and methanol. Alcohols are also polar molecules. Thus, alcohols are completely miscible with water, meaning they are 100% soluble. This makes denatured alcohol an excellent drying agent. It dries a bit slower than acetone, but works just as well. In contrast, if you were cleaning oily parts, you might choose a non-polar solvent such as paint thinner or xylene.
-
Klean-Strip Phosphoric Prep and Etch ($15.78/gallon at Home Depot).
-
Klean-Strip Denatured Alcohol ($7.28/quart or $15.98/gallon at Home Depot).
-
Testors Dull Coat #1260 ($4.79 at Hobby Lobby) or equivalent satin lacquer spray coat.
-
Pyrex measuring cups for etching and alcohol rinsing.
-
A bucket for water rinsing.
-
A warming plate to speed the etch process (coffee warmer, thrift store $5 or similar hot plate).
-
Nitrile gloves or equivalent. I use nitrile gloves from Harbor Freight, $6.99/box.
-
A pair of goggles while handling acids. You never know when you might have an accident that could splash acid into your eyes.
-
Oil of some kind for true “oil and phosphate”.
Procedure
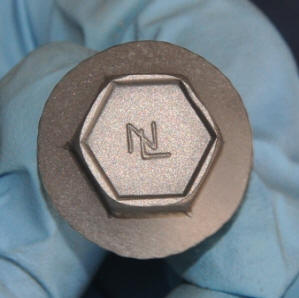

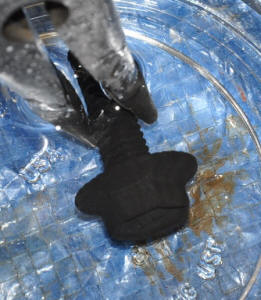
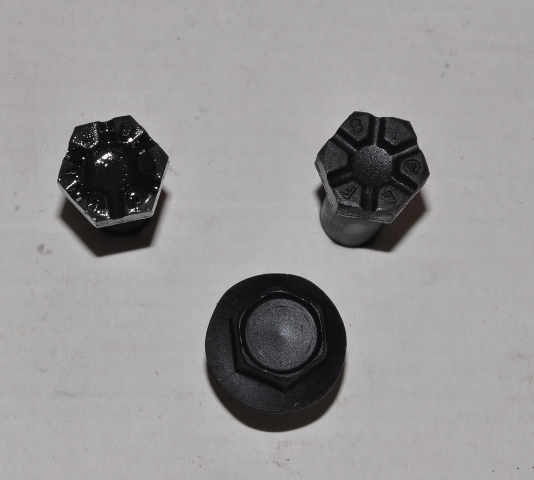
Following the water rinse, it went straight into the alcohol rinse. A quick blast of air dries it immediately. You can see the heavy iron phosphate crystals on the surface.
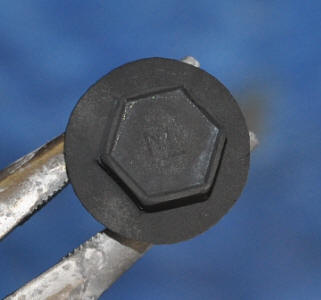
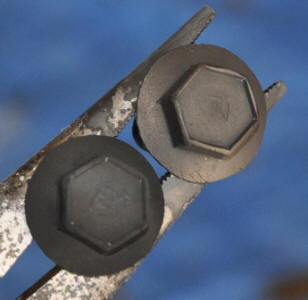
In the picture on the left, the bolt on the left is as it came out of the alcohol rinse, the bolt on right has been wiped with a towel to remove the excess phosphate crystals. It is now ready for the Dull Coat lacquer or oiling. If you oil them, the excess phosphate will come off as you wipe them. If you lacquer them, you may want to experiment with wiping the excess material off or not. The bolt on right has just been sprayed with the Dull Coat lacquer.
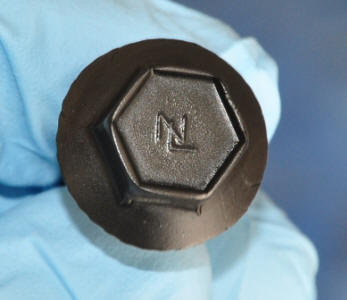
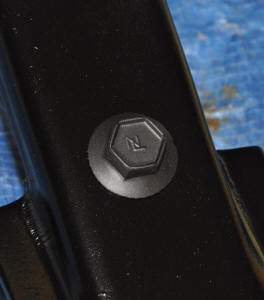
The bolts in the left picture below show a freshly oiled bolt on the left, and one that has been allowed to soak over night. The third bolt is a black phosphate commercially available bolt without the correct logo.. The middle picture shows the bolt in the shock tower. You can see that it still is retaining a dull steel color compared to the black paint. At the right, the bolt is installed on the shock tower in the engine compartment. The bolts did not suffer any finish damage from the socket.

*Le Chatelier's Principal: If a chemical system at equilibrium experiences a change in concentration, temperature, volume, or partial pressure, then the equilibrium shifts to counteract the imposed change and a new equilibrium is established.